Wednesday, March 13, 2019

Storyboard

In class Ethan and I have decided to write out our entire storyboard. This will aid us in planning out the types of shots being incorporated in each segment of our opening scene. 

Before completing this process, I wanted to explore the actual benefits of storyboarding to see if it was worth the time. To be completely honest, I have never really used a storyboard in past projects because I thought it was pointless and a waste.

After doing much research, I have concluded that I was totally wrong. Yes, indeed, it is super important for my partner and I to plan out the opening scene aspects before the actual filming day. 

Storyboarding allows us to set up the film before it is even made. This visualization will allow us to potentially see the problem areas in which we can fix ahead of time. Just because we have a vision in our minds of how we see the film looking like, does not mean it is practical and planned out. Drawing or writing out a storyboard will take our vision to paper. Like we did here: 


Okay maybe this is not exactly what a storyboard should look like, I guess you can say this is "our version." 

Instead of drawing all of our parts for the opening, we wrote them out, all with separate titles that indicate what the main character is doing. Underneath these brief titles, we wrote out some camera shots we want to be focused on in these various segments. We made them brief and to the point which may seem confusing, but when conversed about how we want it to be executed, we wrote down the words that made sense to us. 

The large bracket that is enclosing some of the segments is meant for a 360 angle. This is when the actors are standing still and a tripod with the camera is literally going in a 360 circle around them. We thought that this decision would make the scene more interesting and catch the viewers eye. 


In this video, the camera is spinning around the still actors. These shots definitely intrigued me when I saw it due to the suspense-ish aspect and the focus on the characters. I forsake want to incorporate this technique in my own project. 

Monday, March 11, 2019

Filters

Before we started to do our storyboard, my partner had brought up the idea of having filters within the final project, I immediately turned him down.

I think that filters add a "fake" factor to the overall video footage and does not really have a positive effect. However, Ethan told me to look up films that utilize filters just to see if that changes my mind. 

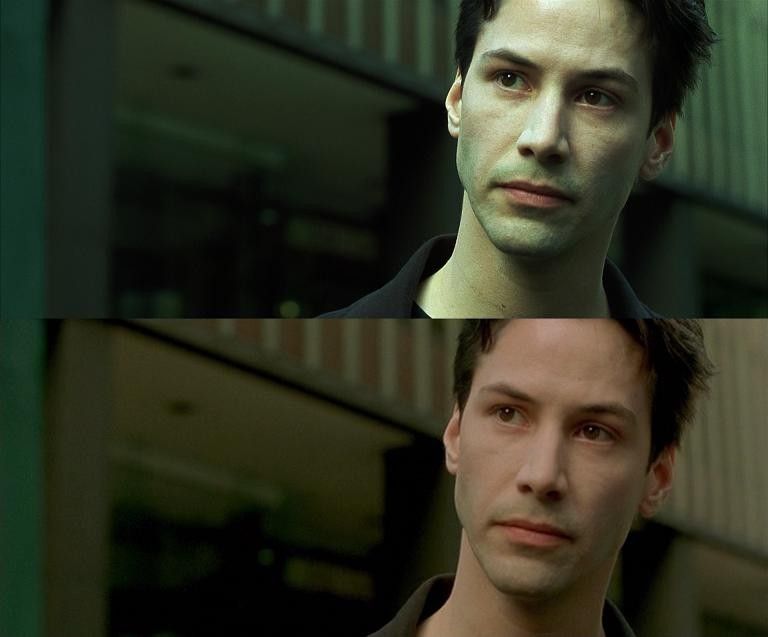
I found an aspect called "color grading." This is when the appearance of the film is improved when captured in different environments on different devices. Color is important because it effects mood and can change a film from looking lifeless to alive. In my opinion, I would rather watch a colored film rather than a black and white / grayish one. 


Like the picture seen above, I agree to utilize this technique. When my partner said filters I did not even think of color grading. I thought filters meant black and white or those super corny saturated ones. I really like the concept of color grading for every aspect of the film opening so everything looks the same. 


Since I have never heard of this before I want to make sure that we are able to use color grading in our own project. This video gives a step by step on how to alter the various recordings in order to color grade correctly. 

Ethan and I have agreed to use this for our own video and we are going to make sure to view this video as we are editing in order to get the color on screen we want. Having color on a film overall enhances viewer engagement, which is something we want to achieve with our own. 

Saturday, March 9, 2019

Changing our minds..

After a student in my group discussion suggested that my partner and I should use "Adobe Pro" to edit our final project, I asked my partner if he knew what it was since I have never heard of it. 

However, my partner disagreed with using "Adobe Pro" and suggested that we should use an application called "WeVideo." He argued that since we have used this platform in the past, it is best we utilize it for our final project and not something new that we have never used before. I agreed with this, even though "Adobe Pro" looked cool, we should use an application we are familiar with.

"WeVideo" is compatible with a Mac Book laptop, which is the technology we each are going to use to edit each part of the film opening. Since our high school, Cypress Bay, subscribes to "WeVideo," my partner and I get the application at no cost (again, a major plus!)


This is the home screen a user sees as they are editing a project. "WeVideo" allows he or she to layer multiple items such as pictures, audio or effects all simultaneously. This feature will specifically benefit my partner and I since our voice over narrator will be speaking over multiple videos as the beginning credits, in text, are showing with the title. 

This application also has a variety of transitions within it. The long list of transitions will help Ethan and I incorporate ones we have never used before as we want to change from one scene to another. 

"WeVideo" also allows more than one person to work on a specific project at a time. Ethan and I will be working on our project simultaneously in order to be more efficient. This also allows us to communicate easier since we will both be looking at the same screen at the same time. 

Even though I am not an experienced editor, I am trusting that the application "WeVideo" will aid my partner and I for our final project. The easy-to-use platform has features that is specified to what we need for our film opening. 

Never thought that I would say that I am actually excited to start editing!

Friday, March 8, 2019

A possible voice over platform

Since I will be the one adding my voice into the background of the film opening, I must research various applications to find the perfect one to cater what I am looking for. 

Ethan and I both agreed that we do not want to use the iPhones' recording application titled "Voice Memos" because the quality is not adequate enough for a film opening. We tested it by using headphones as I said a couple sentences, but the rustling noise was distracting and my voice was not able to be heard clearly. We then tried without the headphones, thinking that the rustling noise would stop, but that was not the problem. Still, we were not happy with the quality of the platform.

After the couple of trials, we were unhappy with the iPhone so I started researching different applications we could utilize for our project.

I heard a student in another Media Studies class talking about "NCH Software." 
https://www.nch.com.au/wavepad/index.html?kw=voice%2520over%2520software&gclid=CjwKCAiAiJPkBRAuEiwAEDXZZU48qlrrgqWRDLJ223-urkfGlWymxfwCt24FJ97a8KPhOBIvwwGDrhoCJkwQAvD_BwE

Since I am super curious about this, I immediately looked up NCH online to see how the application works. First of all, it is completely free, that is a plus! Also, the first thing I read was that it is compatible with Mac Book laptops which is exactly what I need. 

NCH, also known as WavePad Audio Editing Software, allows users to:

  • "Sound editing tools include cut, copy, paste, delete, insert, silence, auto-trim, compression, pitch shifting and more
  • Audio effects include amplify, normalize, equalizer, envelope, reverb, echo, reverse and many more
  • Supports almost all audio and music file formats including mp3, wav, vox, gsm, wma, au, aif, flac, real audio, ogg, aac, m4a, mid, amr, and many more
  • Batch processing allows you to apply effects and/or convert thousands of files as a single function
  • Scrub, search and bookmark audio for precise editing
  • Create bookmarks and regions to easily find, recall and assemble segments of long audio files
  • Advanced tools include spectral analysis (FFT), speech synthesis (text-to-speech), and voice changer
  • Audio restoration features including noise reduction and click pop removal
  • Supports sample rates from 6 to 192kHz, stereo or mono, 8, 16, 24 or 32 bits
  • Edit the audio from your video files
  • Works directly with MixPad Multi-Track Audio Mixer
  • Easy to use interface will have you utilizing non-destructive audio editing in minutes"

This is definitely way more efficient than the iPhone's "Voice Memos" platform. 

In class productivity

Today's class was super successful!  I am so happy with how it went!

Every student divided into about five groups, each consisting of five or six people. If one is working with another student on the project, they had to separate into different clusters. The main goal of these gatherings was to explain our own projects and converse with everyone on either on ideas or improvements. Once a student gave her explanation, the listeners are to give his or her opinion and suggestions on how to make it better. The fact that every partner was separated made it better because then each individual can receive even more feedback rather than just from four people. 

As I was listening to others explain their magazines or film opening ideas, I made sure to express all of my constructive criticism in order to aid their projects and hoping they would do the same for me. 

When it was my turn to describe my film opening aspects, I began the discussion by showed the multiple students in my group the "Love, Simon" clip that I have previously added to this blog last week. I thought that by showing the opening scene of this film would show my vision rather than me trying to explain each characteristic as some may not be able to envision my explanation.  

Indeed, that worked! They understood my film opening vision, which is a "teen flick," and agreed that this genre and execution was a unique idea that they thought could be completed successfully. 


In their opinion, Adobe Pro is a more efficient editing software than iMovie is, which is a platform I have been using for a long time. It offers a free trial for a week which is more than enough time for my partner and I to develop our film opening. If I end up liking its' features, I will purchase for future editing. 

They informed me that this editing application is trouble-free with the sound techniques, which is an aspect I do not have much experience in. Adobe Pro allows users to includes dials that lets editors eliminate background noise, a feature I need if we end up filming a part of our film opening in school. 

Also since I am doing this film opening project with a partner, this editing software allows more than one individual to work on the video. This aids us in making our project more efficient and allows us to communicate easier. 

I am super excited that the group discussion was successful since I learned something I have never heard of! I definitely will be looking further within this editing software. 

Monday, March 4, 2019

What to film what to film ...

As I mentioned in a previous post, my partner and I have established that the overal genre of our film is “teen flick.” 

We are going to start our storyboard today so before we do so, I am brainstorming what exactly where I want the locations to be. 
The two minutes of the film opening is going to be about the main character’s life (me). I would like for her to have a best friend and if we were to make an actual movie about it, the film would be about their crazy adventures together. 

I know what you’re thinking - so what are you going to film?

I want the opening scene to be relatable to the teen audience. That means the narration has to be comical and conversational. 

Here is a slight overview of the scene: (once the story board is finished I will insert the shots on a separate post)

We are going to start as the teen wakes up on a normal day. This part of the scene her hair will not be done and she humors herself on the voice over about how she looks. As she finishes getting ready, she will introduce the audience to her best friend. Her best friend will be perfectly done up; with make up and nice clothes, the opposite of the main character. Since the film is about their adventures together, there will be fun shots of them at the mall, singing in the car together, or tanning by the pool. The voice over will include how they met and how the main character feels about her best friend. 

We want the shots to be as lighthearted as possible since this is directed to be relatable to the teenage audience. By the end of the scene we will end it with “and this is where it all went wrong” to leave the audience in mystery and surprise. 

Sunday, March 3, 2019

Thinking of the storyline

As each day is going by, I am getting more and more excited about filming this opening scene.

My partner and I were discussing the scene aspects such as the actors, where it will take place, what it is going to be about and what tools we are going to use to achieve this.

We have decided to base the entire first scene on a teenager's life. Ethan thinks that I should be the main character in our project. I am nervous to do this since I am always the one behind the camera, not in front of it. If I end up taking the role as the narrator, I will be voice overing each part of the opening. We are still trying to figure out what we are going to be filming. I was thinking that we can film me getting out of bed in the morning, showing my family, me rushing to school, not 100% sure yet what the whole film should encompass.

We want to leave the audience in a mystery as to what is going to happen next. I thought of ending the scene with a line that makes people want to keep watching like,"And this is where it all went wrong" or "I never thought my day was going to end up like it did." I am not positive as to what the exact words are going to be since I have not started the script writing, but those are just ideas.

The topic of the location came up in our discussion of filming and we have tons of ideas. Ethan has a professional camera that we can use to record the entirety of the scene. I also have professional lighting that we can use for the house scenes if the natural light does not work out. If we were to film a morning routine of a teenager rushing to school, the house would have to be well-lit and easy to maneuver around. Also, when showing the teenager arriving at school, the location of Cypress Bay is trouble-free, since we only need a couple of shots in the parking lot.

The equipment and locations are easily accessible. The only issue is that we need to be certain about what we are going to be specifically filming.

CCR

I cannot believe this is all over! Thanks for following along on my journey. Here is my CCR!